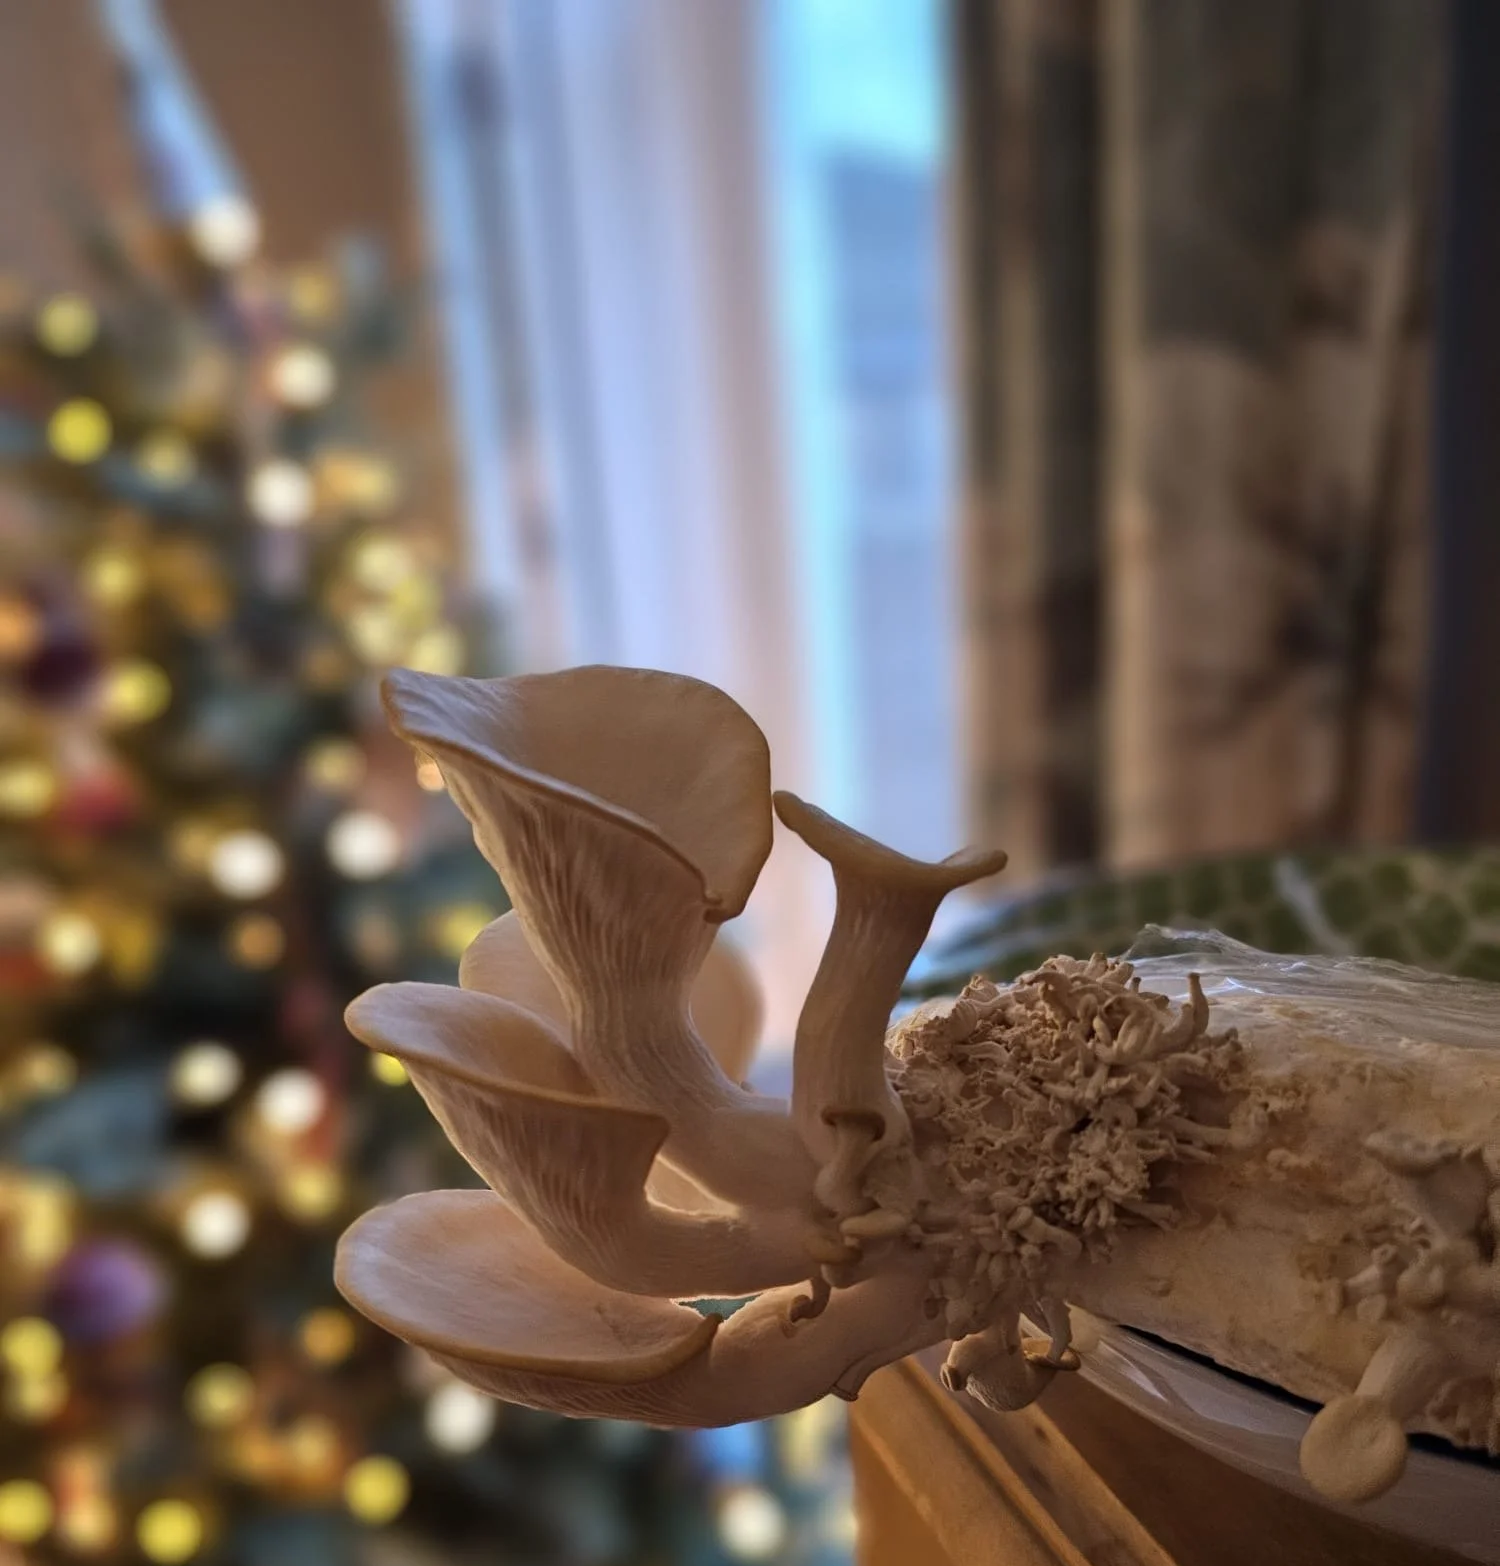
I hope you had fun :)
In case you didn’t catch something during the workshop, here you will find the all the information you need at home.
Important Notes:
● Spores: The mushroom we used in the workshop is a special sporeless variety of oyster mushrooms. Too many spores can sometimes cause respiratory issues. The lack of spores makes this mushroom variety completely safe to fruit at home!
● Edibility: it is hard to get information from the toilet roll producers on what's inside the paper so I can not guarantee that you can safely eat the mushrooms. But you can start a garden bed or coffee ground substrate with it after harvesting. The mushrooms grown from there are then safe to consume.
● Questions or feedback? Use the contact form or send an email to info@lvllupfungi.com if you want to add pictures. Your feedback and questions help me create better instructions and workshops in the future :)
Thanks for joining the workshop!
How to keep your new friend happy
What You Will Need At Home:
● Your toilet paper mushroom grow kit in the bag
● A spray bottle with clean water
Step 1: Find a Good Location
Choose a shady spot for your grow kit with a stable temperature. Avoid placing it in direct sunlight, which can dry out the mushrooms!
Place the toilet paper roll on a plate, and make a tent over it with the plastic bag. Ideally the temperature is somewhere between 21°C to 27°C. Lower temperature means they will colonise slower. Try to avoid temperature over 30 degrees. For fruiting the temperature can also be as low as 15°C.
once you have placed your toilet paper roll, leave only a bit of the bag open. This will allow enough air in without drying out the mycelium.
Step 2: Start Misting the roll.
Once your fungi has fully colonised the substrate it is ready to start producing mushrooms.
The key to growing mushrooms is to keep the air around them humid. The best way is to use a spray bottle with clean, non chlorinated water to mist the inside wall of the bag.
Up to twice a day, use your spray bottle to mist the inside of the plastic bag. Avoid spraying the toilet paper roll and mushrooms directly unless they seem to dry out. If the bag surface is still moist don’t mist the bag as water collecting on the bottom of the bag can lead to contamination. Always use your spray bottle on the setting that creates the finest mist.
Step 3: Watch the mycelium grow
Within a few days, mycelium will spread from inside the roll to cover the whole toilet paper. In this time, the mycelium only needs very little fresh air. Keep the bag nearly fully closed at the top. This will allow enough air in the bag while avoiding the toilet paper roll to dry out.
In this time you will most likely need very little misting.
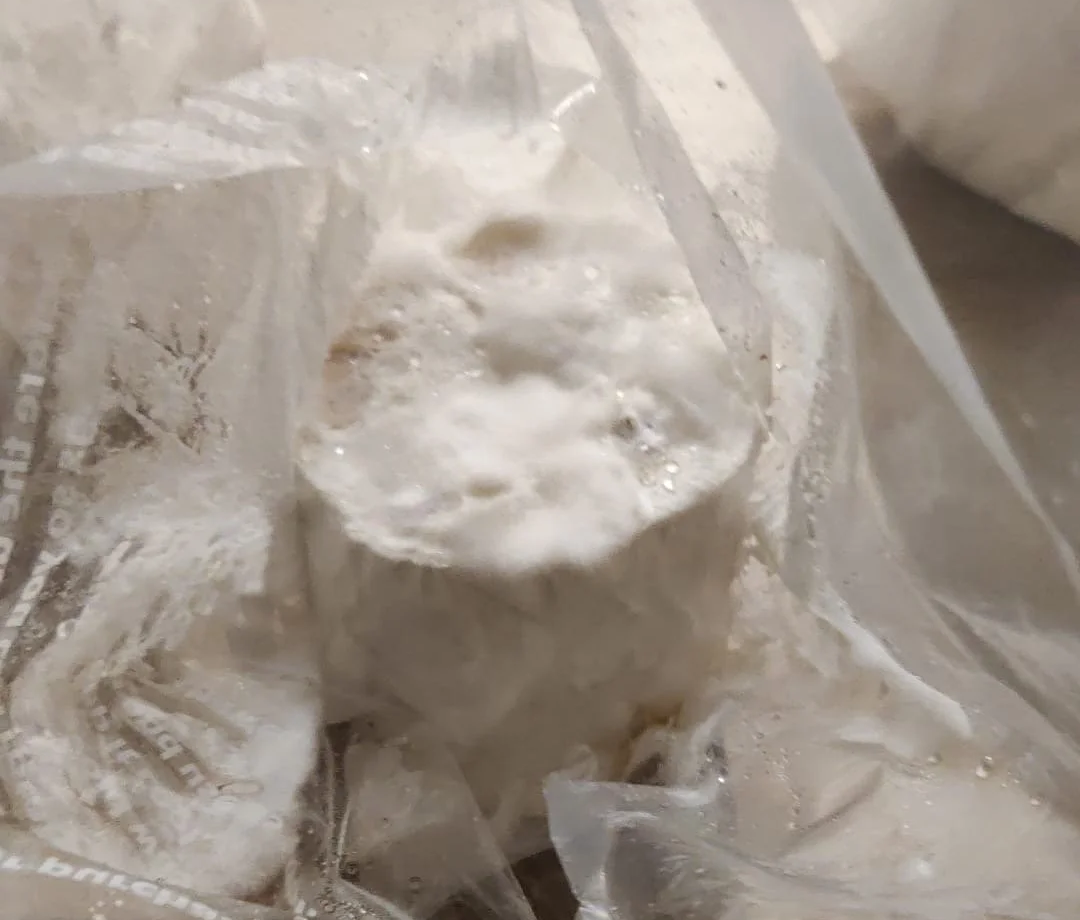
The toilet paper roll will be covered by the fluffy oyster mushroom mycelium
Step 4: The first mushrooms appear
A few days after the whole toilet paper roll is fully colonised it is ready to start producing mushrooms. In the beginning they will look like little pinheads, getting bigger by the day. When you start to see the little fruitbodies, open your bag fully at the tope leaving significantly more air in. Mushroom need air just like us. If they lack oxygen, they will grow very long stems without caps or look like a coral.
If you see them looking like that, open the bag further to allow more air to get in. You can also fully remove the bag or fold it so it only reaches the top of the toilet paper roll.
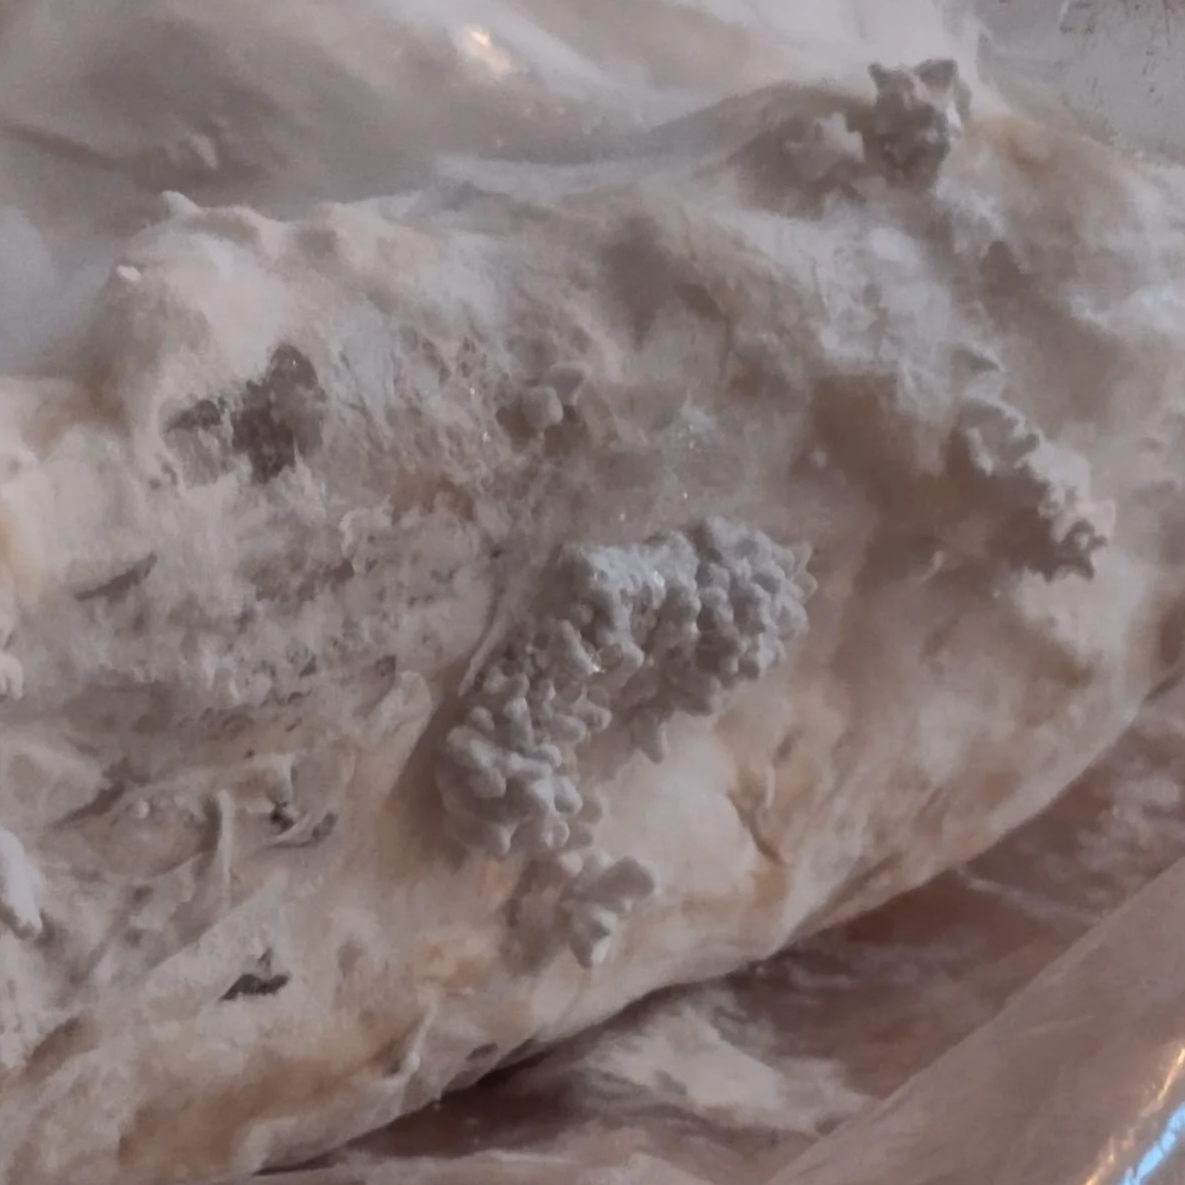
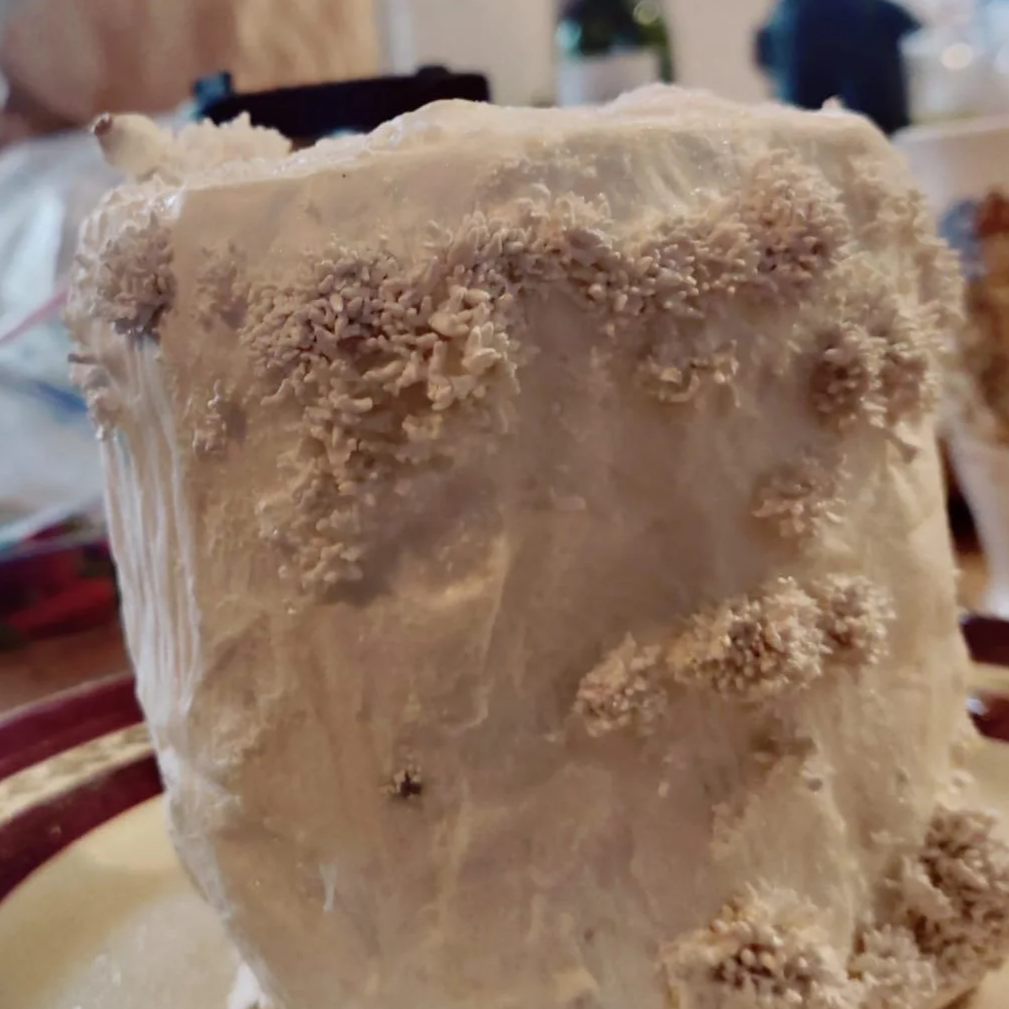
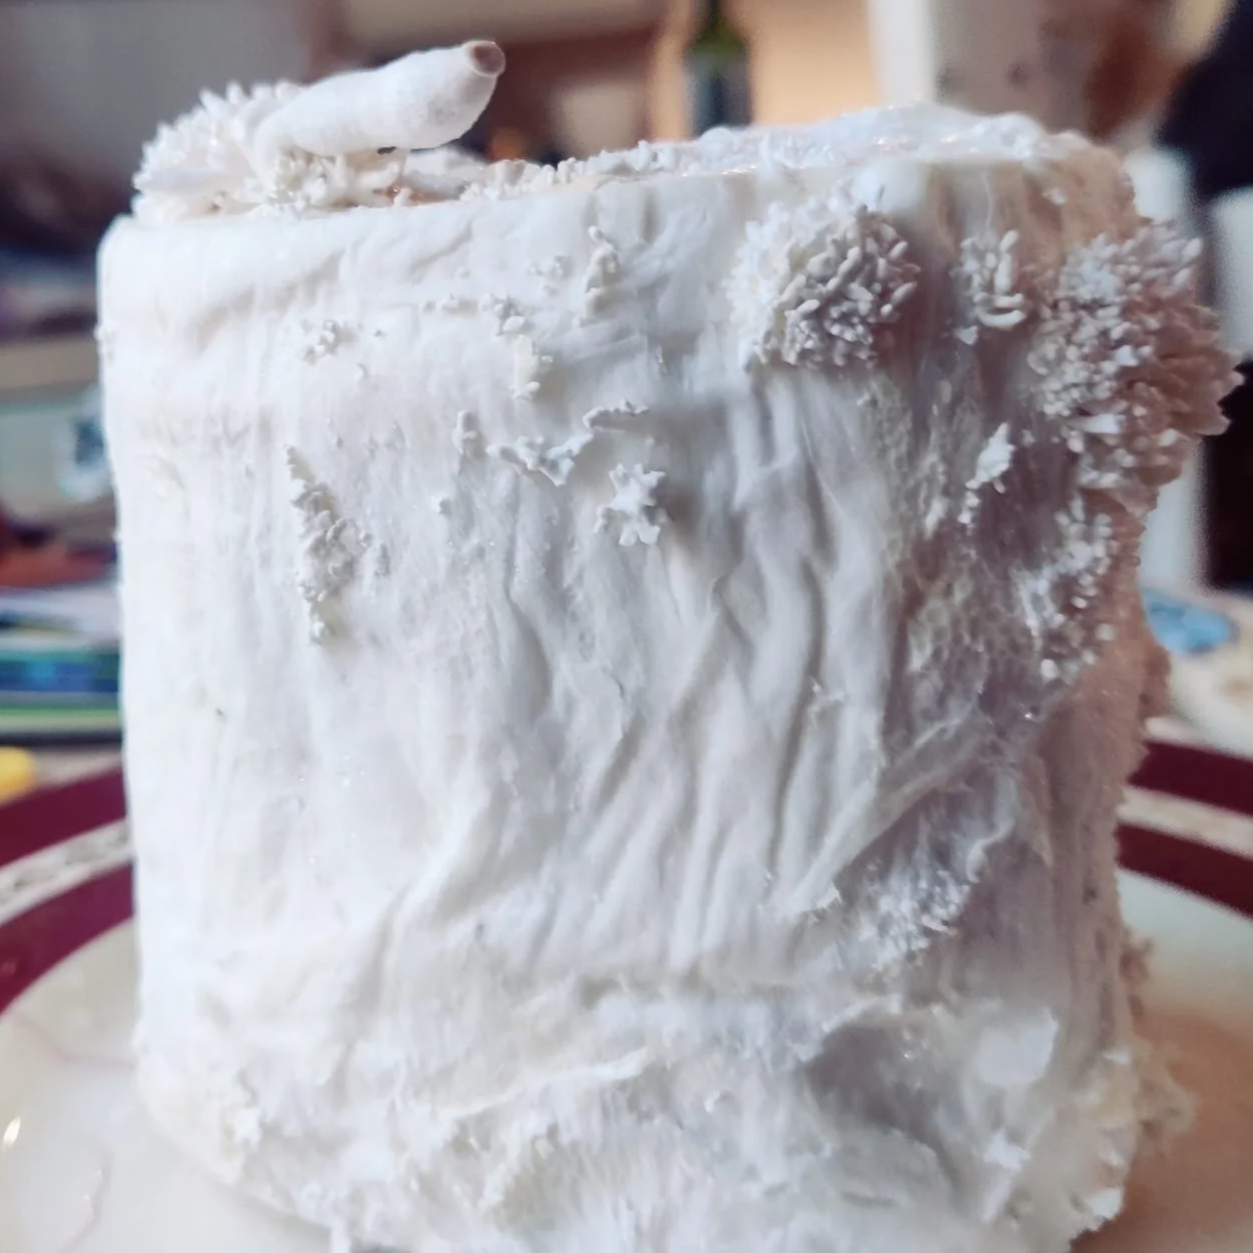
The mushrooms start to form these little pins that are called primordia. They will, under the right conditions, form fully grown mushrooms. Don’t worry if not all develop fully, this is completely normal and no need to worry.
Frequently asked questions during the growing period:
Q: There is white fluff growing on my toilet paper roll. Is this mold?
A: Very unlikely. Most likely it is the oyster mushroom spreading. Mold will quite quickly turn green or other colours. When touched with clean paper, mold leaves spore powder on it.
Q: Do the toilet paper rolls often get moldy?
A: No. The rolls themselves very rarely develop mold. Once fully colonised by the oyster mushroom it will fight off mold and other contamination even in unfavourable settings. Mushrooms not harvested for too long though will develop mold or start to rot and smell bad.
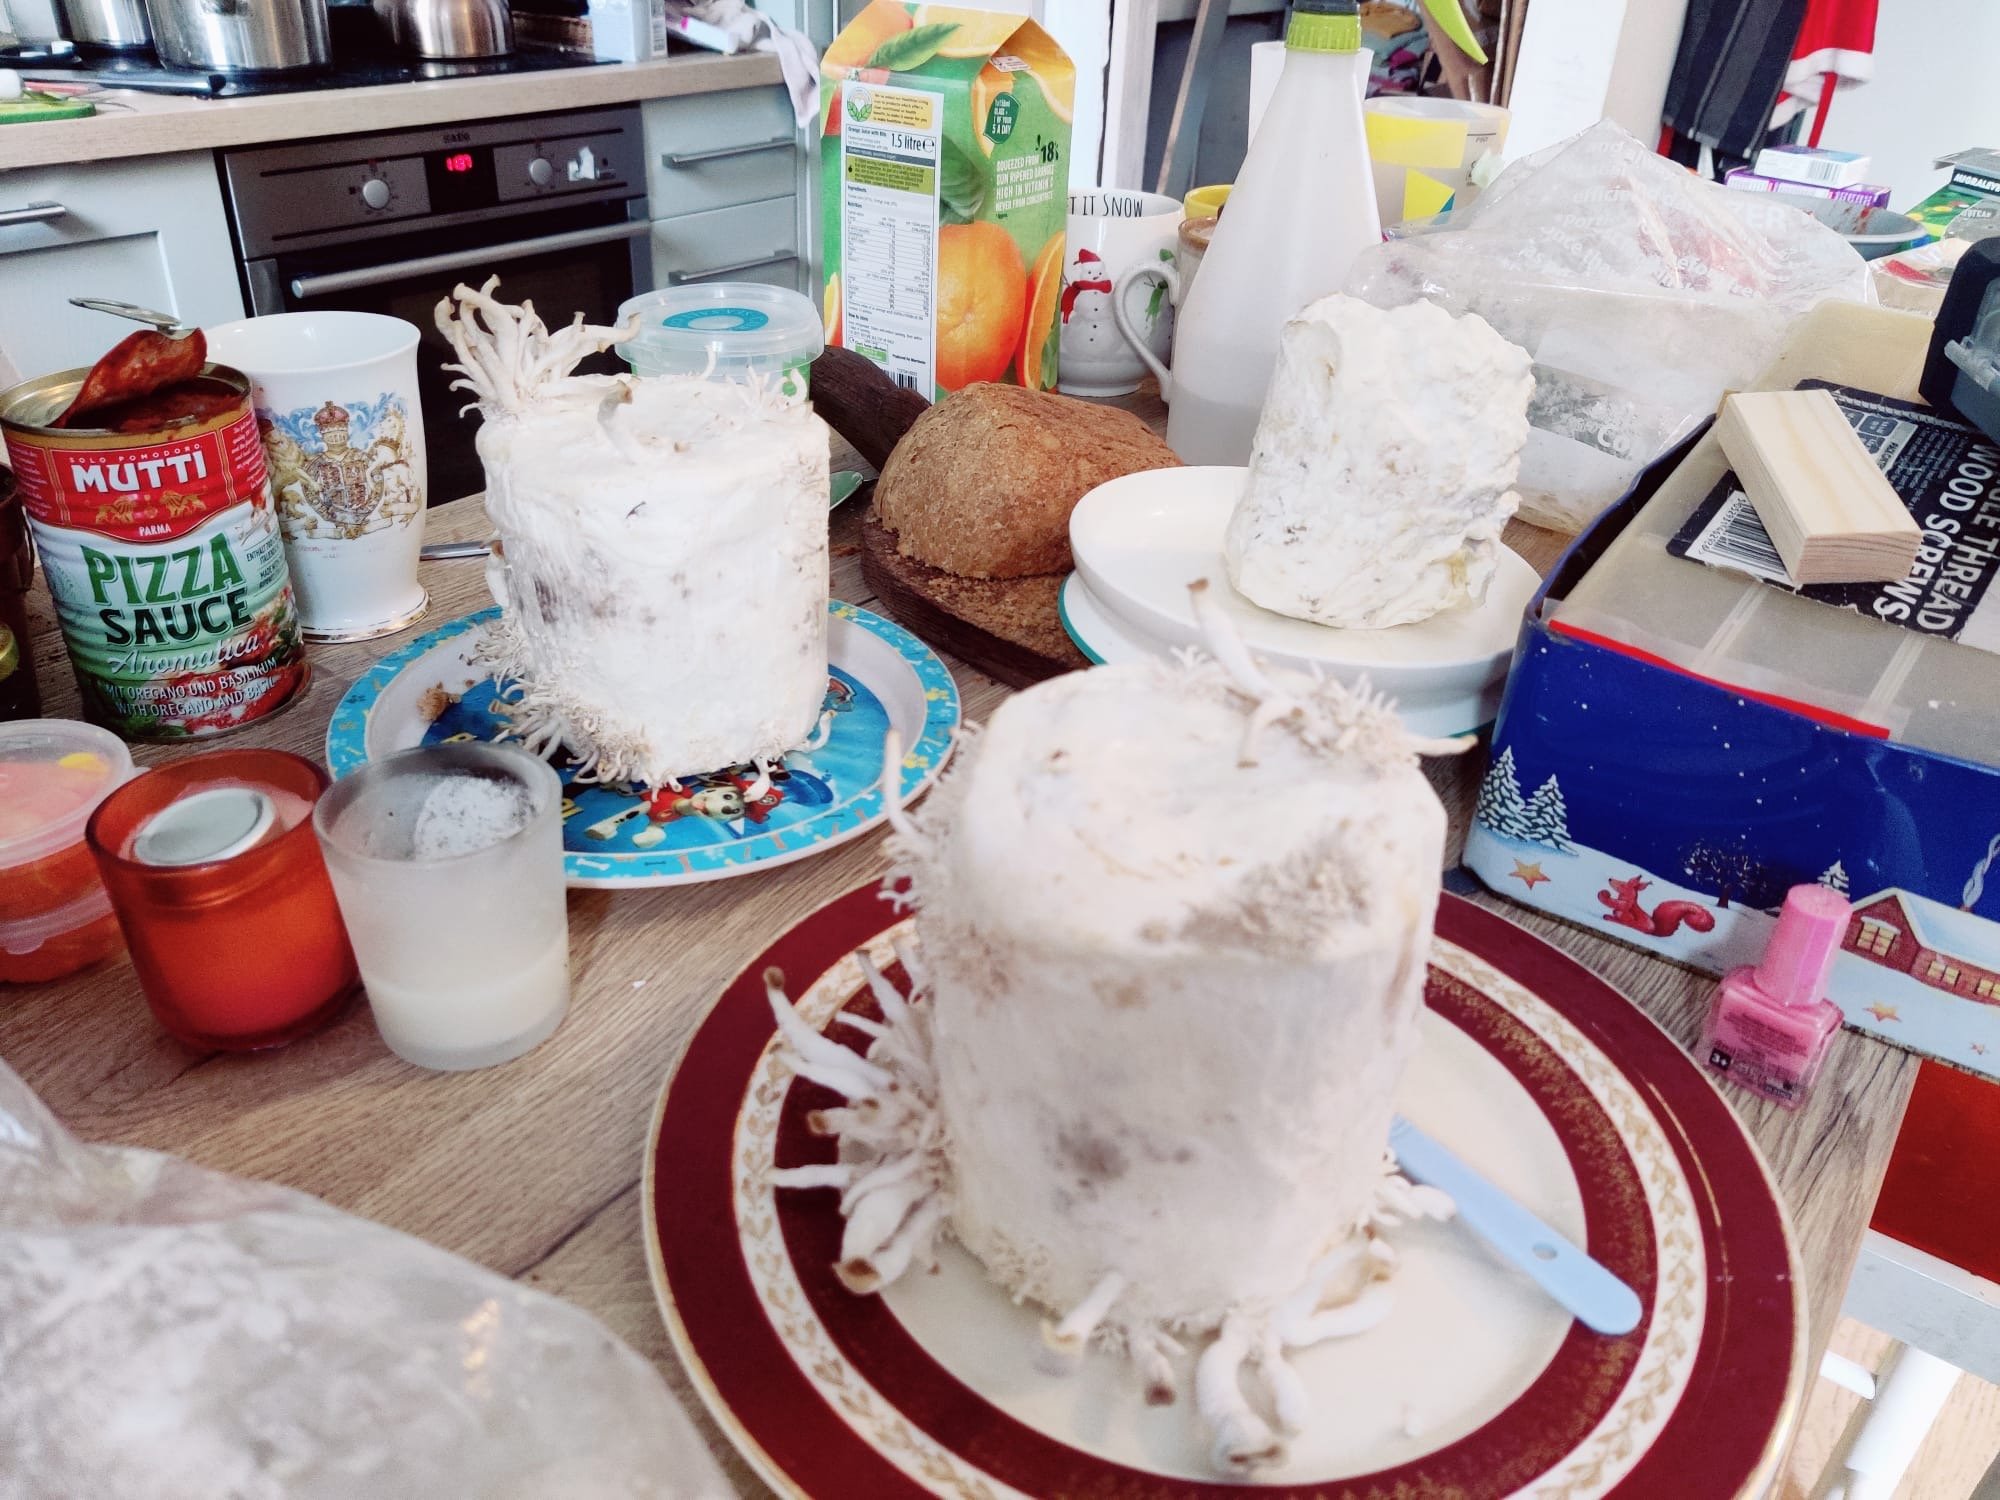
Even in less than ideal environment the toilet papers develop mold. (no, this is not my kitchen :D)
Q: My mushrooms look like this, what went wrong?
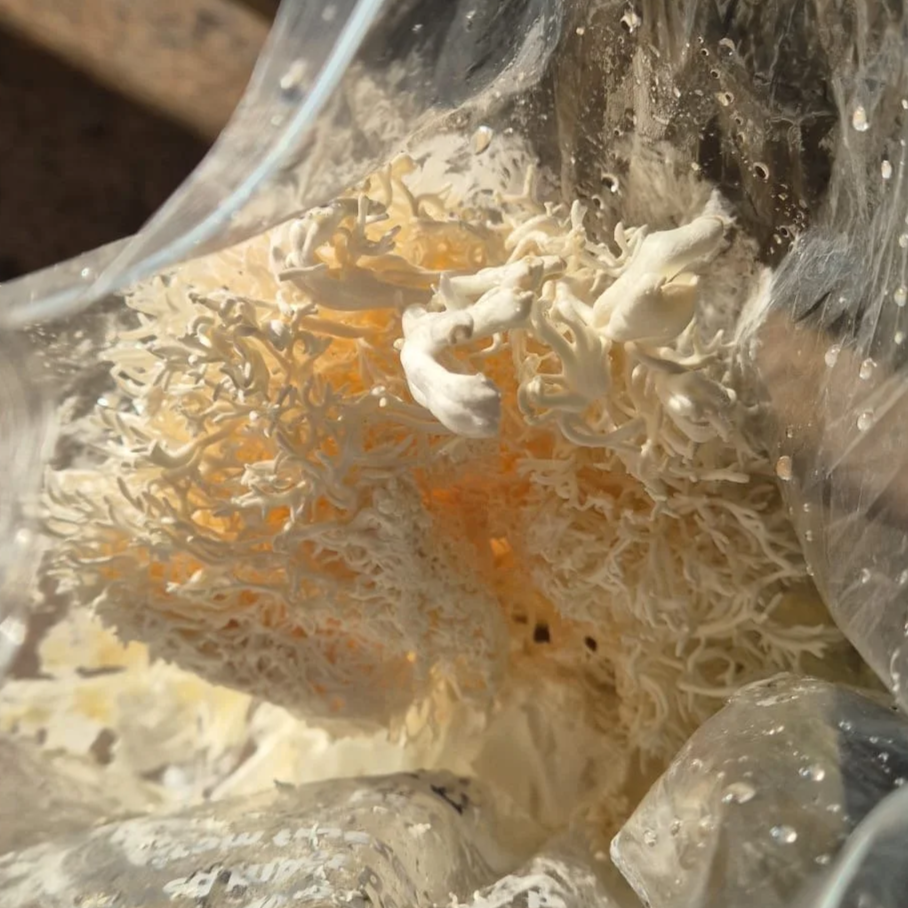
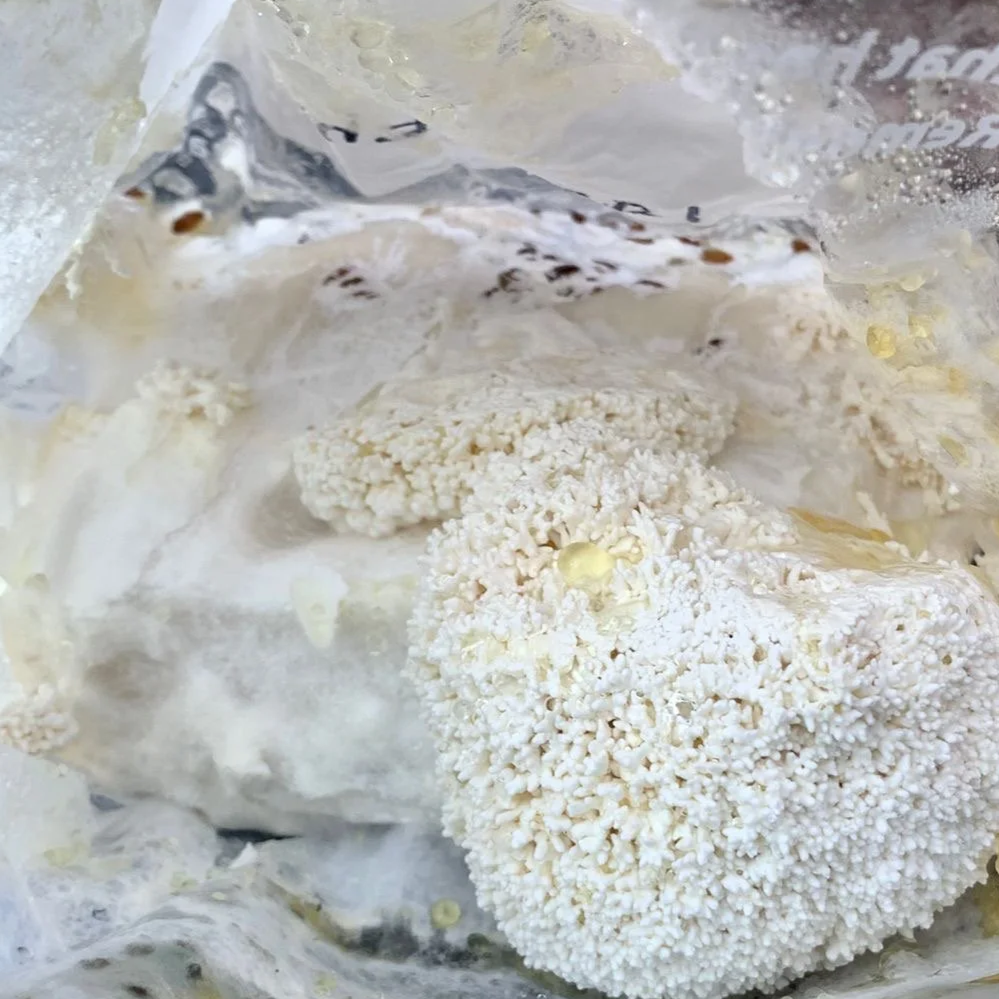
A: These mushrooms had too little oxygen after starting to grow and created long stems with no caps. Those are unlikely to form full mushrooms anymore. Remove the growth and wait for new mushrooms to form.
Q: My toilet paper rolls are already fully colonised since a long time and no mushrooms come out. What should I do?
A: Check that there is enough moisture in the bag. If you made sure there is always enough moisture on the bag there might be a problem with the temperature. If the temperature is quite high, you can try to cold shock your toilet paper roll. Just close the bag and put it over night in the fridge. This simulates autumn weather and kick off fruiting.
Q: Can I leave my toilet paper roll outside too?
A: Depending on the temperature outside this will work just fine. Same as indoors, avoid temperatures over 27°C. As long as temperatures are above freezing in the night, it will work to fruit them outdoors. If it is that cold though, let it first colonise indoors before putting it outside. A good spot for it without a bag would be under bushes or leave plants where it stays out of the sun and stay moist. Keep the soil around the toilet paper moist so it has enough humidity to fruit.
Step 5: Harvest Your Mushrooms
The mushrooms will take around a week to fully form, depending on the temperature.
Your mushrooms are ready to harvest when the caps are fully formed and the edges are still a bit curled up. To harvest, gently twist and pull the whole cluster of mushrooms.
Step 6: Let me know how it went!
We all learn best if we learn together. Sharing your experience lets me create better workshops and instructions. I would appreciate if you take the time to let me know how it went. If you have pictures you would like to share with me please do so!
Step 7: Prepare for a Second Harvest
After your first harvest, you can continue misting the kit to try for a second "flush" of mushrooms. You might get a smaller yield this time.
Step 8: What to do with roll after your last harvest.
You can compost your toilet paper roll in the organic waste but there are more exciting things to do with it. here are some ideas:
● Mycelium materials are used and studied for the strength and sustainability. They are used to create various things such as everyday objects such as lamp shades or tables, packaging materials, insulation materials and many other applications. Oyster mushrooms are often used for such projects and a lot of research is done with them. You can see for yourself how strong material from them can be by simply drying the roll. You can do that by just putting your toilet paper roll in a warm place with air flow or put it in the oven at around 60 degrees and let it in there until dry. Even when the surface is dry, it might still be wet inside so place it at a warm place until it is solid.
Try standing on it, it will easily carry your weight without breaking.
● Growing more mushrooms. Just like with the inoculum we used in the workshop, the fruited mushroom roll can be used to inoculate new material. for this, rip it up with clean hands or gloves and use it as a starter. With this inoculum you can start growing a garden bed in your garden or grow it on coffee grounds indoors.
Instructions for this you will have to find on your own in the internet. Just replace whatever inoculum is used in the instruction with your toilet paper roll.
Thank you again for joining, I hope your oyster mushrooms will develop nicely. If so or also if not, be sure to send me some feedback. It is much appreciated :)
And if you want to learn a bit more about fungi in gardens or want to see where you can catch another workshop of mine, be sure to check out the rest of my website.
All the best
Lorin